3-Ingredient Butterfinger Fudge: The Easiest No-Bake Recipe for Sweet & Crispy Bliss
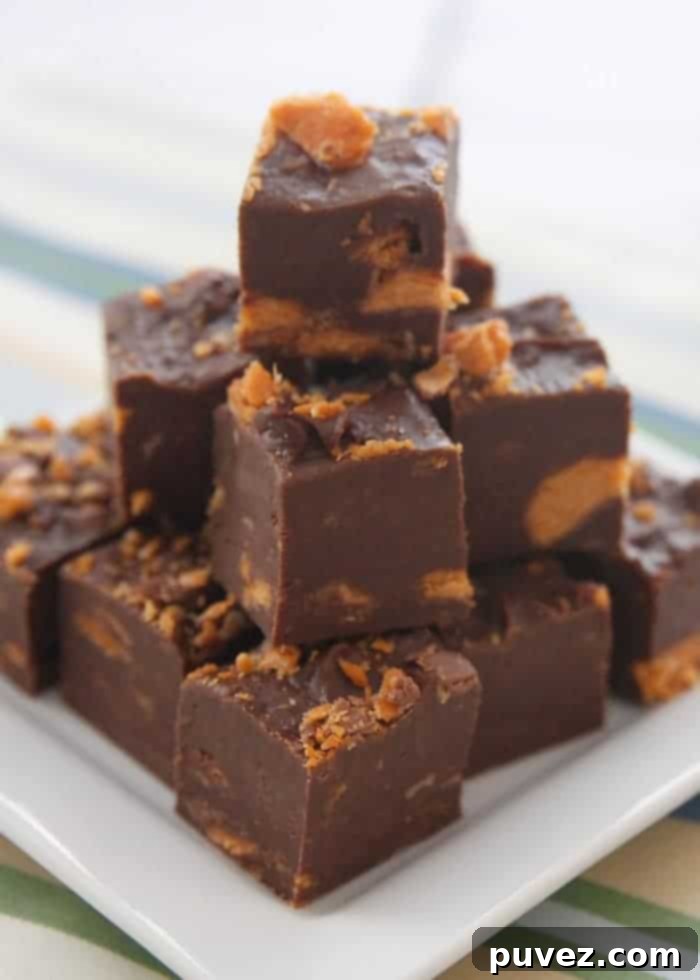
Are you searching for that perfect sweet treat that requires minimal effort but delivers maximum flavor? Look no further! This **3-Ingredient Butterfinger Fudge** recipe is a game-changer for anyone who loves quick desserts. In just a few minutes of active preparation and a short chill time, you’ll create a batch of incredibly rich, creamy fudge, generously studded with the iconic crispy, flaky, peanut butter deliciousness of Butterfinger candy bars. It’s the ultimate no-bake indulgence, perfect for satisfying sudden sweet cravings or preparing a delightful homemade gift.
As a passionate baker and dessert enthusiast, I’m always thrilled to discover recipes that marry simplicity with spectacular taste. This Butterfinger Fudge truly embodies that philosophy. It’s the kind of recipe that empowers even the most novice cook to whip up something truly impressive, with less time spent in the kitchen than it takes to enjoy a cup of coffee.
The Sweet Story Behind This Speedy Fudge Recipe
My journey to perfecting this delectable Butterfinger Fudge began, as so many wonderful culinary adventures do, with the vibrant community on social media. I genuinely love spending time on the Chocolate, Chocolate and More Facebook page. It’s a joyful space where we connect with fellow sweet treat lovers from across the globe, sharing inspirations, drooling over incredible creations, and offering encouragement with a simple “like” or a kind comment. It’s more than just a platform; it’s a testament to how shared passions can build a supportive and inspiring community.
Not long ago, I shared a fantastic recipe for Reese’s Fudge from The Recipe Critic, and as expected, it was an absolute sensation! After all, who could resist creamy fudge generously packed with Reese’s Peanut Butter Cups? But then, a brilliant spark of inspiration came from Scott, one of our wonderful community members. He suggested that this style of easy fudge would be equally amazing with Butterfingers. The moment I read his comment, a lightbulb lit up!
While I always trust the fantastic suggestions from our community, I also needed a compelling reason to dive back into making another batch of quick fudge so soon. And honestly, I absolutely ADORE Butterfingers! That unparalleled combination of crispy, flaky, and crackly peanut butter layers is truly captivating. The way the candy shatters beautifully when you bite into it (or, conveniently, when you chop it with a knife for this recipe) adds a dynamic texture that is unmatched by most other candies. It was an undeniable calling – Butterfinger Fudge was immediately added to the must-make list!
The Irresistible Allure of Butterfinger in Fudge
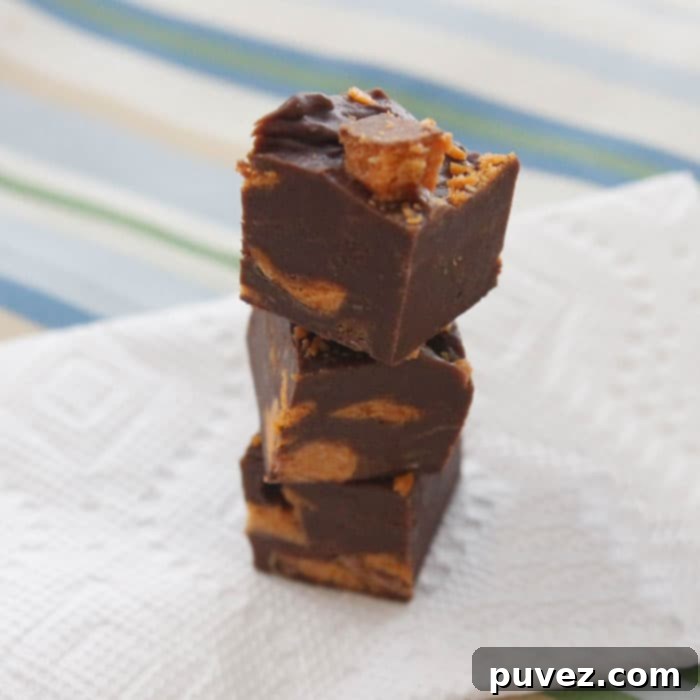
What is it about Butterfinger candy bars that makes them so perfectly suited for incorporation into fudge? It’s all in their distinctive, multifaceted texture. Unlike many other peanut butter candies that might simply melt away or become overly chewy within a fudge base, Butterfingers steadfastly maintain their unique structural integrity. When finely chopped, they introduce a delightful contrast—a wonderful, shattering crispness against the smooth, melt-in-your-mouth creaminess of the fudge. Every single bite delivers that signature “shattering crackle” of Butterfingers, transforming this simple dessert into a truly unforgettable culinary experience.
Chopping up candy bars for a recipe always brings a little extra joy to my kitchen, especially when I know they’re destined for a decadent treat like this fudge. For optimal visual appeal and an extra textural pop, I highly recommend reserving a small portion of your chopped Butterfingers. These can then be artfully sprinkled over the top of the fudge before it sets. These small, thoughtful details are what elevate a simple, easy dessert into something that looks and tastes truly special.
Mastering Your 3-Ingredient Butterfinger Fudge: Pro Tips & Troubleshooting
While this 3-ingredient Butterfinger Fudge is delightfully simple to make, a few key tips and tricks can help ensure your batch turns out absolutely perfect every single time:
Selecting Your Ingredients Wisely
- **Chocolate Chips:** Opt for good quality semi-sweet chocolate chips. Their slight bitterness offers a beautiful balance against the inherent sweetness of the Butterfingers and sweetened condensed milk. If you prefer a sweeter fudge, milk chocolate chips can be used, but adjust for richness.
- **Sweetened Condensed Milk:** This ingredient is absolutely essential for achieving the fudge’s signature creamy, smooth texture. Double-check that you’re using *sweetened condensed milk* and not evaporated milk, as they are distinctly different products and not interchangeable in this recipe.
- **Butterfinger Bars:** “Fun-sized” candy bars are convenient for chopping, but feel free to use standard or king-sized bars; simply chop them into roughly 1/4 to 1/2-inch pieces.
Achieving the Perfect Melt
The microwave method is incredibly fast, but careful monitoring is key to prevent burning. Begin by heating the chocolate chips and sweetened condensed milk for 1 minute on high. Remove and stir vigorously until the chips are completely melted and the mixture becomes smooth and starts to thicken into a fudge-like consistency. If there are still unmelted chips, continue heating in short, 30-second bursts, stirring thoroughly after each interval. Overheating can cause the chocolate to seize or become grainy, so gentle, incremental heating is always best.
Preparing Your Pan for Effortless Removal
Lining your 8×8-inch square baking pan with parchment paper is a non-negotiable step for easy removal. Ensure you leave a slight overhang of parchment on the sides; these “handles” will make lifting the fully set fudge out of the pan an absolute breeze, allowing you to achieve beautifully clean and precise cuts.
The Art of Folding in the Fun
Once your chocolate and condensed milk mixture is perfectly smooth, swiftly fold in the majority of your chopped Butterfinger pieces. Work quickly but gently, as the fudge will begin to firm up as it cools. Don’t forget to save a small handful of chopped Butterfingers to sprinkle evenly over the top of the fudge before it goes into the refrigerator – this adds both visual appeal and an extra layer of crunch!
Setting and Storing Your Delicious Creation
Refrigerate the fudge for a minimum of 2 hours, or until it is completely firm to the touch. This crucial step ensures that you can achieve neat, clean cuts without the fudge sticking or crumbling. Once set, use the parchment paper overhang to carefully lift the fudge block from the pan. Cut it into desired 1-inch squares. For optimal freshness, store the fudge in an airtight container at room temperature for up to one week, or in the refrigerator for extended shelf life. If refrigerated, allow it to come to room temperature for about 10-15 minutes before serving to achieve the best, creamiest texture.
Get Creative: Variations and Customization Ideas
While this Butterfinger Fudge recipe is absolutely perfect on its own, it also serves as a fantastic base for culinary creativity! Feel free to experiment with these delicious variations:
- **Alternate Candy Bars:** Inspired by the original Reese’s Fudge, this base recipe is incredibly versatile. Try swapping Butterfingers for chopped Snickers, Heath bars, Kit Kats, or your personal favorite crunchy candy!
- **Nutty Enhancements:** For an added layer of crunch and flavor, fold in a handful of chopped roasted peanuts, cashews, or pecans with the candy bars.
- **Flavor Extracts:** A subtle addition of 1/2 teaspoon of pure vanilla extract can beautifully enhance the overall flavors. For an even bolder peanut butter punch, consider adding a touch of peanut butter extract.
- **White Chocolate Base:** For a completely different flavor profile and a visually striking contrast, use good quality white chocolate chips instead of semi-sweet. This will make the vibrant orange and brown Butterfinger pieces really stand out!
This easy, customizable fudge is an ideal treat for any occasion – from holiday gifting and potlucks to simply satisfying your personal sweet tooth on a quiet afternoon. Its impressive taste and minimal preparation make it a consistent winner every single time.
Connect with Chocolate, Chocolate and More!
Facebook | Twitter | Google+ | Pinterest | instagram
Easy 3-Ingredient Butterfinger Fudge Recipe

Ingredients
- 3 cups semi-sweet chocolate chips
- 1 can (14 ounces) sweetened condensed milk
- 8 fun sized Butterfinger Candy Bars (or equivalent of about 6-7 oz), chopped
Instructions
- Chop Butterfinger candy bars into small, bite-sized pieces. If desired, set aside a small portion (about 1/4 cup) to sprinkle on top of the fudge later. Line an 8×8 inch square baking pan with parchment paper, ensuring there’s an overhang on all sides to easily lift the fudge out once it’s set.
- In a large, microwave-safe bowl, combine the semi-sweet chocolate chips and the entire can of sweetened condensed milk. Heat on high power in the microwave for 1 minute. Remove the bowl and stir the mixture vigorously with a spoon or spatula. Continue heating in additional 30-second intervals, stirring thoroughly after each, until the chocolate chips are completely melted and the mixture is smooth, glossy, and begins to thicken into a fudge consistency.
- Working quickly, fold the majority of the chopped Butterfinger candy into the melted fudge mixture until it’s evenly distributed throughout. Pour the fudge mixture into the prepared pan and spread it out evenly using a spatula. If you set aside any chopped Butterfingers, sprinkle them over the top of the fudge.
- Transfer the pan to the refrigerator and chill for at least 2 hours, or until the fudge is completely firm and set. Once firm, use the parchment paper overhang to lift the entire block of fudge out of the pan. Place it on a cutting board and cut into 1-inch squares using a sharp knife. Store the Butterfinger fudge in an airtight container at room temperature for up to 1 week, or in the refrigerator for an extended shelf life. For best texture, let refrigerated fudge sit at room temperature for 10-15 minutes before serving.
Did you make this recipe?
Please leave a comment on the blog or share a photo on Instagram
Beyond Butterfinger: Explore More Easy Fudge Recipes!
If you’ve fallen head over heels for the sheer simplicity and incredible deliciousness of this Butterfinger Fudge, then you’re truly in for a treat! The world of easy, no-bake fudge is vast and wonderfully creative. Expand your dessert repertoire with these equally irresistible fudge recipes, perfect for any occasion, from holiday gatherings to everyday sweet cravings:
Classic Chocolate Peanut Butter Fudge
Decadent Red Velvet Fudge
Creamy Eggnog Fudge
Luxurious Dark Chocolate Peppermint Fudge
Fudge Inspiration from Fellow Food Bloggers:
- Cappuccino Fudge from Inside Brucrew Life
- Strawberry Daiquiri Pie Fudge from Crazy for Crust
- Pumpkin Butterscotch Fudge from Mom on Timeout
- Black and White Fudge from Jen’s Favorite Cookies
Final Thoughts on Your New Favorite No-Bake Treat
This 3-ingredient Butterfinger Fudge is so much more than just a recipe; it’s an open invitation to effortlessly create something truly delicious and deeply satisfying. It beautifully embodies the joy of simple baking, the satisfaction of achieving a perfect texture, and the sheer delight of sharing sweet moments with family and friends. Whether you consider yourself a seasoned baking aficionado or a complete kitchen novice, this straightforward recipe guarantees a fantastic outcome with absolutely minimal fuss.
So, take a moment to gather your three simple ingredients, dedicate just a few minutes of your time, and prepare to be utterly amazed by how easy it is to make this crispy, creamy, and utterly delightful Butterfinger Fudge. Once you’ve made it, don’t forget to share your wonderful creations and valuable comments with our community – I always love hearing about your personal kitchen adventures and seeing your delicious results!
