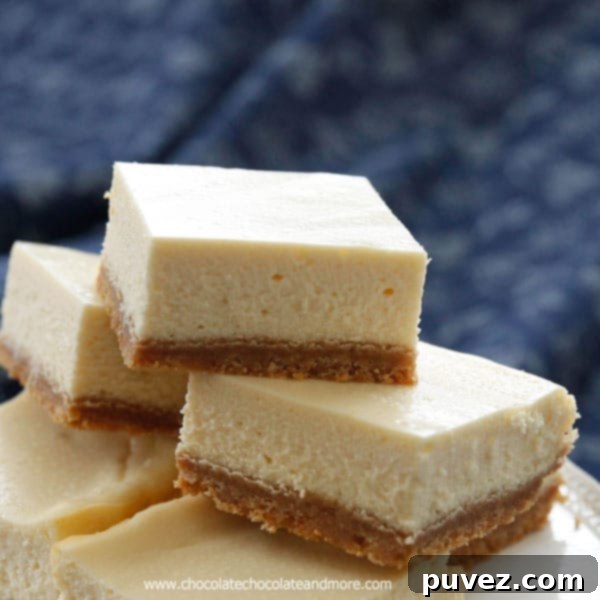
Indulge in Homemade Perfection: The Ultimate Classic Cheesecake Bars Recipe
Life often throws unexpected twists, and sometimes, those twists lead to the most delightful outcomes. This past week, I found myself called for jury duty, an experience I approached with a mixture of civic responsibility and a touch of anticipation. Being in rural Georgia, I imagined a quaint courtroom drama, perhaps a minor disagreement over a fence line, or the curious case of a stolen garden gnome. The prospect of observing the local justice system in action, no matter how small the case, felt like an interesting way to spend a day.
I made sure to arrive a full twenty minutes early, only to find the courthouse parking lot already overflowing and the courtroom packed. It’s a small town, so it wasn’t surprising to see familiar faces – I recognized the judge, two of the attorneys, and at least twenty other prospective jurors. As the session promptly began, the Judge meticulously worked his way down a list of about fifteen cases on the docket. With around 200 of us in the room, I thought there was a good chance I might be selected for a jury.
The Judge called each case, confirming the presence of all parties and taking notes. On the second pass through the list, he began dismissing cases where only one party had shown up, quickly clearing five or six disputes. A few more cases saw the involved parties head out to the hallway for last-minute settlement negotiations, often a sign that a resolution was within reach. One particular child support case was swiftly settled by the judge himself in under five minutes, an impressive display of efficiency.
By the end of it all, only one case remained set for trial, and even in that instance, the defendant opted not to have a jury. In less than an hour, my brief stint as a potential juror was over, and I was heading back home. A tiny part of me felt a flicker of disappointment; I had envisioned a day filled with the solemnity of court proceedings. However, this feeling was quickly replaced by a wave of unexpected joy: I had an entire, unscheduled day to myself!
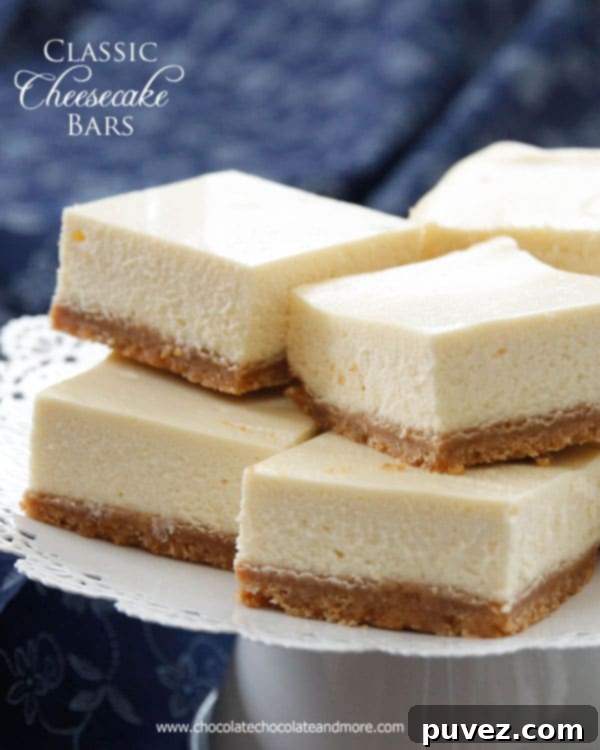
An Unplanned Day Off Deserves a Sweet Reward: Why Cheesecake Bars are Best
What does one do with a sudden, glorious free day? The sensible voice in my head suggested catching up on chores, tackling the mounting laundry, or finally organizing that overflowing cupboard. But the other voice, the one that knows how to truly celebrate an unexpected break, loudly proclaimed, “Cheesecake!” And not just any cheesecake, but my absolute favorite: Classic Cheesecake Bars. This indulgent treat was the perfect reward for a day that took an unexpected turn.
When it comes to cheesecake, I consistently choose bars over a traditional round cake, and for several excellent reasons:
- Effortless Preparation: While the core recipe for cheesecake remains consistent, preparing it in a square or rectangular baking dish for bars streamlines the process significantly. There’s no need to meticulously seal a springform pan or worry about water baths to prevent cracks. Simply line your pan, press in the crust, and pour the filling.
- Perfect Portions Every Time: Cheesecake bars offer built-in portion control. Each square is a satisfying, individual serving, making them ideal for sharing at gatherings, packing in lunches, or simply enjoying as a guilt-free treat. They feel less daunting and “heavy” than a large slice from a traditional round cake.
- Convenient for Any Occasion: These bars are incredibly easy to eat. You can simply pick one up with your hands, making them a fantastic option for potlucks, picnics, or casual dessert spreads where forks and plates might be cumbersome.
- Versatile and Adaptable: The classic cheesecake bar recipe is a fantastic foundation. It’s easy to customize with different toppings, crust variations, or flavor swirls, allowing you to get creative while still enjoying that beloved cheesecake taste.
So, with a whole day unexpectedly free, the decision was simple: it was time to bake some Classic Cheesecake Bars. It’s the perfect way to turn a slightly disappointing jury duty experience into a truly sweet and relaxing day.
Essential Baking Tip: The Ingenious Foil Lining Trick
Before you begin assembling your delicious cheesecake bars, mastering the art of lining your baking pan is crucial. This simple trick ensures your bars lift out cleanly and effortlessly, making cleanup a breeze. If you haven’t tried this method for lining a pan with foil, prepare to have your baking world changed:
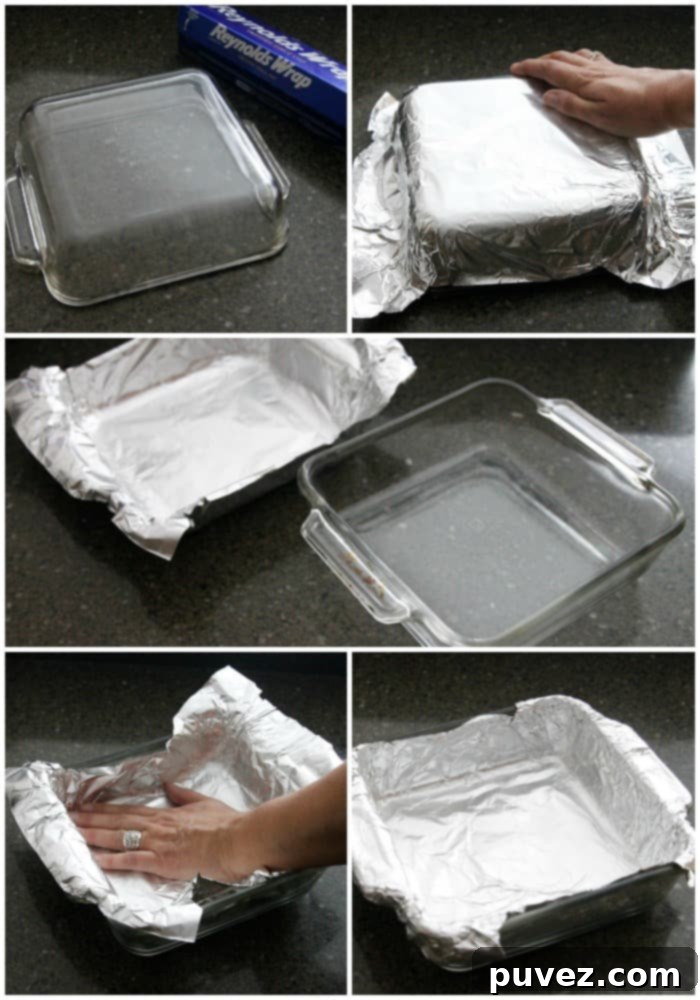
- Invert Your Pan: Start by flipping your 8×8 square baking dish completely upside down, so its bottom is facing upwards.
- Mold the Foil: Take a generous sheet of aluminum foil – large enough to cover the bottom and extend up the sides with plenty of overhang. Gently press and shape the foil over the inverted bottom of the pan, carefully forming it around the corners and edges. You’re essentially creating a foil mold of your pan.
- Transfer to the Inside: Carefully remove the perfectly shaped foil from the inverted pan. Flip your baking dish right side up, and then gently press the pre-formed foil into the interior of the pan. Smooth it out, making sure the corners are snug.
This ingenious method eliminates the struggle of trying to press flat foil into sharp corners, preventing tears and ensuring a perfectly smooth, ready-to-fill liner. Once your pan is expertly lined, lightly spray it with non-stick spray for an extra layer of protection, and you’re ready to bring your Classic Cheesecake Bars to life!
Crafting the Irresistible Layers of Your Classic Cheesecake Bars
With your pan perfectly prepped, it’s time to gather your ingredients and assemble these wonderfully simple, yet incredibly flavorful, cheesecake bars. The beauty of this recipe lies in its straightforward approach, combining classic components for a dessert that always impresses.
The Foundation: A Buttery Graham Cracker Crust
A truly exceptional cheesecake bar begins with a perfectly crunchy and flavorful crust. Our recipe uses the beloved graham cracker crust, a harmonious blend of finely crushed graham cracker crumbs, a touch of sugar for delicate sweetness, and rich melted butter. This trio creates a sturdy, buttery base that perfectly complements the creamy filling, adding a delightful textural contrast with every bite.
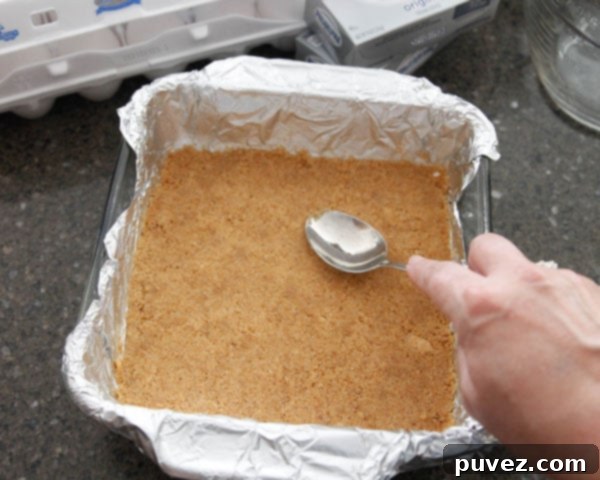
The key to a successful graham cracker crust is ensuring thorough mixing. Combine your graham cracker crumbs, sugar, and melted butter until all the crumbs are uniformly moist – this guarantees a crust that holds together beautifully once baked. Once mixed, press the crumb mixture firmly and evenly into your foil-lined baking dish. You can use the bottom of a glass or a flat measuring cup to achieve a compact, level base. This step ensures your crust is sturdy enough to support the luscious cheesecake filling.
The Heart: A Velvety Smooth Cream Cheese Filling
The true star of any cheesecake is its filling, and this classic recipe delivers a light, creamy, and wonderfully tangy experience. The secret to its luxurious texture starts with softened cream cheese. It’s absolutely essential that your cream cheese is at room temperature before you begin; cold cream cheese will result in a lumpy batter that’s impossible to smooth out. If you’re short on time, don’t worry – I’ve included some quick softening tips at the end of this post!
In a mixing bowl, begin by beating the softened cream cheese until it’s completely smooth and free of lumps. Then, incorporate the sugar and sour cream, beating until well combined. The sour cream plays a vital role here, lending a subtle tanginess that balances the sweetness and contributes to the signature creamy texture of the cheesecake. Next, add the eggs, one at a time, beating just until each egg is fully incorporated before adding the next. This gentle approach helps prevent overmixing, which can introduce too much air and lead to cracks in your baked cheesecake. Finish with a splash of vanilla extract for that quintessential comforting flavor, beating one last time to blend it in.
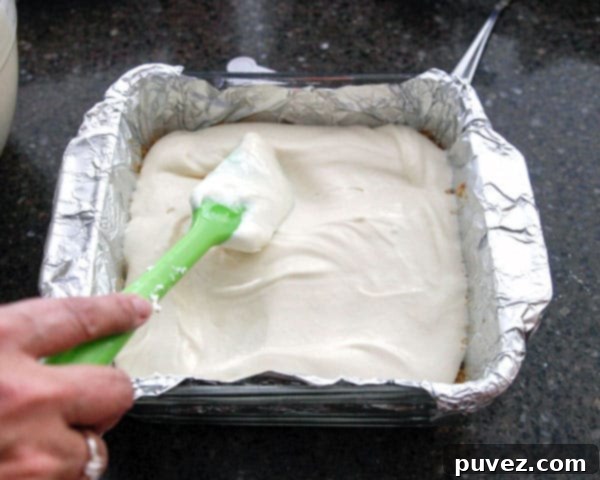
Once your filling is perfectly smooth and airy, carefully spoon it over the prepared graham cracker crust. Gently spread the mixture to create an even layer, ensuring the crust is completely covered. Now, your masterpiece is ready for the oven!
Baking to Perfection and the Art of Cooling
Baking cheesecake bars requires a gentle hand and precise timing to achieve that perfect creamy texture without cracks. Preheat your oven to a moderate 325 degrees Fahrenheit (160 degrees Celsius). This lower temperature promotes a slow, even bake, which is crucial for cheesecakes. Bake the bars for approximately 35-40 minutes, or until the edges are just beginning to turn golden and the center still has a slight, delicate wobble when the pan is gently shaken. This slight jiggle indicates that the cheesecake is set but not overbaked, which would result in a dry or rubbery texture.
The cooling process is just as important as the baking itself, if not more so, for achieving a flawless cheesecake. Once removed from the oven, resist the temptation to cut into them immediately. Allow the cheesecake bars to cool completely at room temperature on a wire rack. This gradual cooling prevents drastic temperature changes that can lead to cracking. Once cooled to room temperature, transfer the pan to the refrigerator and chill for at least 2 hours, though overnight is ideal. Chilling allows the cheesecake to fully set, firm up, and develop its rich flavors, making it much easier to cut into clean, elegant bars.
Pro Tips for Cleanly Slicing Your Cheesecake Bars:
To ensure beautifully neat and tidy slices every time, follow these simple steps:
- Lift and Peel: Once chilled, gently lift the entire cheesecake out of the baking pan using the foil overhang. Carefully peel away the aluminum foil from the sides and bottom.
- Warm Your Knife: Fill a tall cup with hot water. Dip a sharp, thin-bladed knife into the hot water for a minute or two, then wipe it completely dry.
- Slice and Clean: Make each cut with the warm, dry knife. After each slice, wipe the knife blade clean with a damp cloth or paper towel before making the next cut. This prevents the cheesecake from sticking to the knife and ensures pristine, smooth edges for every bar.
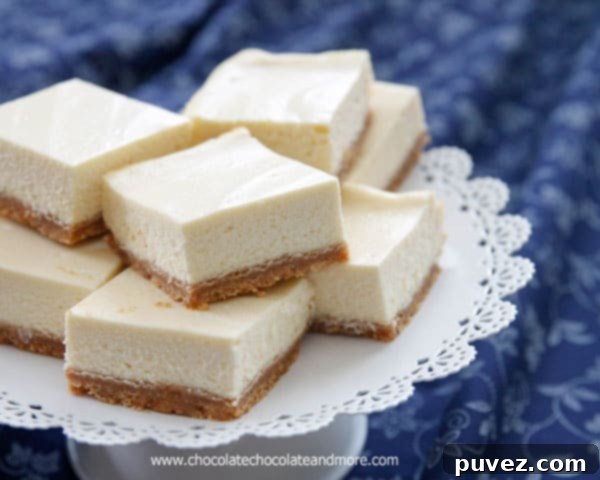
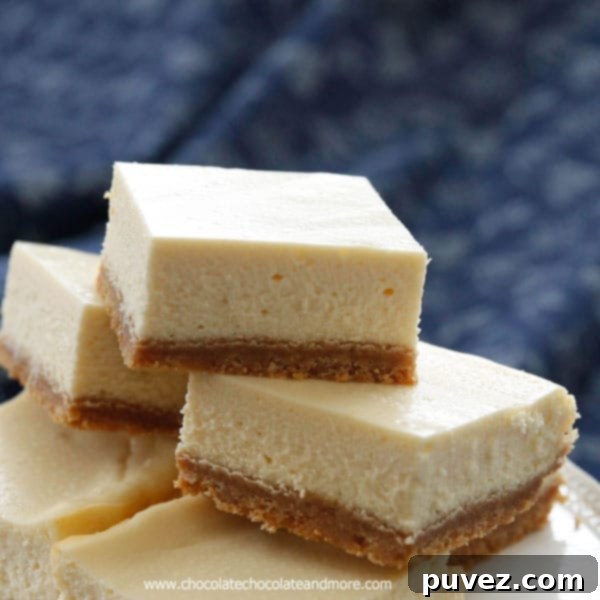
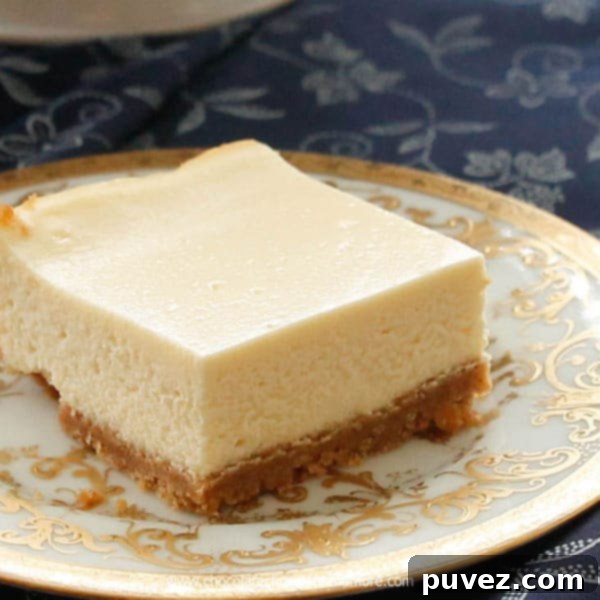
The reward for your patience and effort is a batch of light, creamy, and utterly irresistible Classic Cheesecake Bars, complete with that satisfyingly buttery graham cracker crust. It’s a true classic taste, perfect for any occasion or simply as a well-deserved treat.
As for my unexpected day off, it truly turned into a sweet success. And that $20 check for jury duty? It arrived in the mail yesterday. Not bad for an hour of waiting and a whole day of delightful baking! Sometimes, the best plans are the ones you didn’t even make.
Connect with Chocolate Chocolate and More!
Facebook | Twitter | Google+Pinterest | Instagram
Classic Cheesecake Bars
15 minutes
40 minutes
2 hours
2 hours 55 minutes
Ingredients
Cheesecake Filling
- 16 ounces (2 large bars) cream cheese, softened
- 1/2 cup sugar
- 2 eggs
- 1/4 cup sour cream
- 1 teaspoon vanilla extract
Crust
- 1 cup graham cracker crumbs (1 sleeve)
- 2 Tablespoons sugar
- 1/4 cup melted butter
Instructions
- Line an 8×8 square baking dish with foil. Lightly spray with non-stick spray.
- Combine graham cracker crumbs, sugar and melted butter until all crumbs are moist.
- Lightly press crumb mixture into prepared baking dish.
- In a mixing bowl, beat cream cheese until smooth. Add in sour cream and sugar and beat again.
- Add eggs, one at a time, to cream cheese mixture, beating well after each addition. Add vanilla extract and beat one more time.
- Spoon mixture on top of prepared crust, smoothing to completely cover crust.
- Bake in a preheated 325 degree oven for 35-40 minutes, until center no longer wobbles and edges are just starting to turn golden.
- Remove from oven and let cool completely before refrigerating. Chill for at least 2 hours before serving. For easy cutting, remove cheesecake from pan and pull foil off. Heat a knife in a cup of hot water for a minute or 2, then wipe knife dry before cutting. Wipe knife clean after each cut.
Nutrition Information:
Yield:
9
Serving Size:
1 bar
Amount Per Serving:
Calories: 345Total Fat: 26gSaturated Fat: 15gTrans Fat: 0gUnsaturated Fat: 8gCholesterol: 110mgSodium: 260mgCarbohydrates: 24gFiber: 0gSugar: 18gProtein: 5g
Nutrition information is provided as a guideline only. If you have specific dietary needs, please consult a dietitian.
Did you make this recipe?
Please leave a comment on the blog or share a photo on Instagram
Explore More Cream Cheese Delights!
If you’ve fallen in love with the creamy, tangy goodness of these Classic Cheesecake Bars, you’re in for a treat! Cream cheese is a versatile ingredient that elevates a wide range of desserts. Discover more fantastic recipes that celebrate the delightful flavor of cream cheese – perfect for satisfying any sweet craving or impressing guests.
Cream Cheese Squares
Cream Cheese Mints
Easy Cheese Danishes
Cream Cheese Chocolate Croissant Cookies
Petit Mocha Cheesecakes
You might also love these fantastic cream cheese recipes from our talented friends:
- Cinnamon Cream Cheese Wraps from Nikki’s Sweet Side
- Cream Cheese Monkey Bread from Pip & Ebby
- Strawberry Cream Cheese Coffee Cake from Fake Ginger
Quick Tip: How to Soften Cream Cheese in a Hurry
Forgot to take your cream cheese out of the fridge ahead of time? Don’t let that derail your baking plans! Softened cream cheese is crucial for a smooth, lump-free cheesecake batter. Here are a few quick and easy methods to get your cream cheese to the perfect consistency:
- The Microwave Method: Unwrap the block of cream cheese and place it on a microwave-safe plate. Microwave on high power for 10-15 seconds. Check its softness; if it’s not quite there, microwave for an additional 5-10 seconds. Be very careful not to melt it, just soften it.
- The Warm Water Bath: Keep the cream cheese in its original foil wrapper (or wrap it tightly in plastic wrap to prevent water from seeping in). Submerge the wrapped cream cheese in a bowl of warm (not hot!) water for about 10-15 minutes.
- Cut into Cubes: If you have a little more time (about 15-20 minutes), cut the cold cream cheese into small cubes. Spread the cubes out on a plate; the increased surface area will allow them to soften much faster at room temperature.
For even more detailed advice and techniques on softening cream cheese, you can find additional tips and tricks here. Enjoy your baking, and happy indulging!
