Irresistible Chocolate Decorator Cookies: The Ultimate Guide to Perfect Edible Art
Dive into the delightful world of cookie decorating with these incredible chocolate decorator cookies! Whether you’re a seasoned baker or just starting, this recipe provides the perfect canvas for your edible artistry. Use smooth Royal Icing, creamy frosting, or luxurious melted chocolate to transform these easy-to-make cookies into stunning treats.
The Quest for the Perfect Chocolate Decorator Cookie
For a long time, I’ve been eager to master the art of cookie decorating, ever since I first learned the fundamentals of using royal icing. My inspiration often comes from fellow bakers, and recently, I stumbled upon a batch of adorable snowflake cookies crafted by Baking in Heels. They were, without a doubt, absolutely beautiful. But what truly captured my attention wasn’t just their intricate design; it was the fact that they were *chocolate*!
A quick check revealed that she had found the recipe over at the renowned blog Lila Loa. This is the beauty of the blogging community – we share our culinary discoveries! Lila Loa is celebrated for her cookie expertise, and she claims to have perfected the chocolate cookie with what she boldly calls “The End All for Chocolate Cookies Recipe.” “The End All?” With such a grand title, I simply *had* to try it. And believe me, it lives up to the hype!
The Ultimate Chocolate Decorator Cookie Recipe
Inspired by the fantastic recipe from Lila Loa, these chocolate cut-out cookies are not only easy to make but also incredibly delicious and hold their shape beautifully for decorating. Here’s how you can make them:
Chocolate Decorator Cookies

Ingredients
- 1 cup unsalted butter, softened
- 1/4 cup shortening
- 1 1/2 cups granulated sugar
- 2 large eggs
- 1 teaspoon pure vanilla extract
- 1 teaspoon salt
- 3/4 teaspoon baking powder
- 2/3 cup unsweetened cocoa powder (I used Hershey’s, but a good quality cocoa is key for flavor)
- 3 or 3 1/2 cups all-purpose flour, sifted **** (see notes for important details)
Instructions
- Room Temperature Ingredients: Of course, make sure all ingredients, especially your butter and eggs, are at room temperature. This ensures they emulsify properly and create a smooth, consistent dough.
- Cream Wet Ingredients: In a large mixing bowl, cream together the softened butter, shortening, and sugar until the mixture is light, pale, and fluffy. This can take 2-3 minutes with an electric mixer. Next, add your eggs one at a time, mixing well after each addition. Stir in the vanilla extract until just combined.
- Combine Dry Ingredients: In a separate bowl, whisk together the sifted flour, salt, and baking powder. Gradually add the dry mixture to the wet ingredients. Start with about 2 cups of flour, mix on low speed until combined, then add your cocoa powder and mix. Continue to add the remaining flour (you might need between 1 to 1 1/2 cups more) until a soft, pliable dough forms. Be careful not to overmix, as this can develop the gluten too much and lead to tough cookies. The dough should pull away from the sides of the bowl.
- Roll and Cut: Divide the dough into two or three discs, wrap tightly in plastic wrap, and refrigerate for at least 30 minutes. This step is crucial for preventing spread and making the dough easier to handle. Once chilled, lightly flour your work surface and rolling pin. Roll the dough out to an even thickness of about 1/4 inch, or slightly thinner if you prefer crisper cookies. Use your favorite cookie cutters to cut out desired shapes.
- Bake: Carefully place the cut-out cookies on an ungreased baking tray, or one lined with parchment paper or a silicone baking mat. Bake in a preheated 375°F (190°C) oven for approximately 6 to 6 1/2 minutes. Watch them closely! Cookies should be set but still soft in the center. Overbaking will result in dry, crumbly cookies. My oven tends to run hot, so I often pull mine out at 6 minutes to ensure a perfectly tender crumb.
- Cool: Remove the cookies from the oven and let them cool on the baking sheet for a few minutes before transferring them to a wire rack. Allow them to cool completely before attempting any decorating. Patience here is key for perfect results!
Notes
****Lila Loa has an important note about the flour quantity: it can vary depending on whether you plan to refrigerate your dough for an extended period. More flour tends to make the dough stiffer and less prone to spreading, which is great for intricate cut-outs. I was a bit nervous about over-drying the dough, so I compromised and used 3 1/4 cups of flour, which yielded a perfect consistency for rolling and baking without excessive spread.
Recipe source: ChocolateChocolateandmore.com
Did you make this recipe?
Please leave a comment on the blog or share a photo on Instagram!
Tips for Perfect Chocolate Cookies Every Time
Achieving bakery-quality cookies is easier than you think with a few simple tips:
- Room Temperature Matters: Always start with softened butter and eggs at room temperature. This ensures your ingredients cream together smoothly, resulting in a homogenous dough and a finer crumb texture in your baked cookies.
- Don’t Overmix: After adding the dry ingredients, mix just until the flour streaks disappear. Overmixing develops gluten, which can lead to tough, chewy cookies instead of tender ones.
- Chill Your Dough: This step is non-negotiable for cut-out cookies. Chilling stiffens the butter, preventing the cookies from spreading excessively in the oven and helping them maintain their intricate shapes. Aim for at least 30 minutes, but a few hours or even overnight is better.
- Even Thickness: Roll your dough to an even 1/4 inch thickness (or slightly less). Uneven thickness will result in some cookies baking faster than others, leading to burnt edges or undercooked centers. Use rolling pin guides if you have them!
- Parchment Paper or Silicone Mats: For easy removal and consistent baking, always line your baking sheets. I’m a huge fan of my Silpat Baking Mat. I even found one at my local Ace Hardware for $20.99, which was $5.00 cheaper than anywhere else! These mats provide excellent non-stick properties and promote even browning.
- Watch Your Oven: Every oven is different. Pay close attention to your cookies during baking. They should look set and lose their glossy appearance, but the edges shouldn’t brown significantly. A slightly underbaked cookie is better than an overbaked one for tenderness.
- Cool Completely: This cannot be stressed enough. Attempting to decorate warm cookies will melt your icing and ruin your beautiful designs. Allow them to cool fully on a wire rack before starting.
Decorating Your Chocolate Masterpieces
The best part about these cookies is their versatility. This recipe is fast, with a short baking time, allowing me to whip up and cook an entire batch in about an hour. Once cooled, you have endless possibilities for decoration.
You can certainly enjoy these cookies plain, and they are absolutely delicious on their own. Their rich chocolate flavor is satisfying and perfect with a glass of milk or coffee.
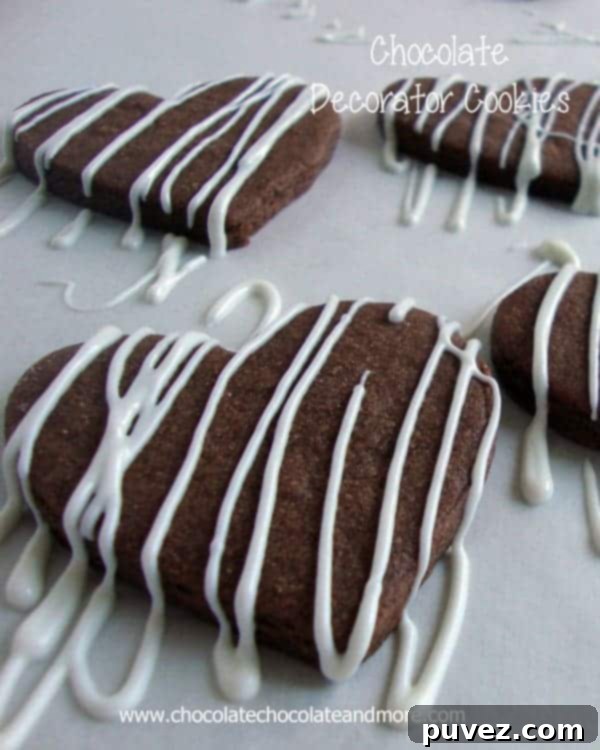
However, if you’re like me, you love to add a little flair! Get out that squeeze bottle filled with melted chocolate and drizzle some luscious chocolate over them. It’s an instant upgrade!
Beyond a simple drizzle, these cookies truly shine with more elaborate decorations:
- Royal Icing: For crisp lines, intricate details, and a smooth, hard finish, royal icing is your go-to. Its quick-drying nature makes stacking and packaging easier. Experiment with different consistencies for outlining and flooding.
- Buttercream Frosting: If you prefer a softer, creamier texture and a richer flavor, a good buttercream frosting works wonders. You can pipe beautiful swirls, rosettes, or spread it smoothly for a classic look. I recently made these decorator cookies into bats for Halloween. The bats were a bit plain, so I sandwiched some Cherry Jam Buttercream in the middle and “glued” two candy eyes on with dark chocolate – they were a huge hit!
- Melted Chocolate: As mentioned, a simple drizzle is fantastic. But you can also dip entire cookies in melted chocolate, add sprinkles, or use a piping bag with a small tip to draw designs directly onto the cookie. For extra shine and a crisp snap, consider tempering your chocolate.
No matter how you choose to serve them, I have to say, these cookies are absolutely delicious. I’m already planning my next batch, and I’m eager to try them with Hershey’s Special Dark Cocoa. I have a feeling they’ll taste just like an Oreo – a truly tempting prospect!
Expand Your Cookie Repertoire!
Looking for even more delightful cookie recipes to decorate or simply enjoy?
Grandma’s Sugar Cookies
Gingerbread Men
Decorating with Royal Icing
Lemon Sugar Cookie Bars
50 Cookies to Fill Your Cookie Jar
Red Velvet Cookies from A Treats Affair
Frosted Maple Leaf Cookies from Tutti Dolci
White Chocolate Oatmeal Walnut Cookies from Sweet Bella Roos
Connect with Chocolate Chocolate and More!
We love seeing your creations! Share your decorated chocolate cookies with us and join our community of chocolate lovers and baking enthusiasts.
Facebook |
Twitter |
Google+
Pinterest |
Instagram
