Easy Truffle Petit Fours: Elegant Bite-Sized Delights for Any Occasion
When it comes to delightful, bite-sized desserts, few things impress quite like a perfectly crafted petit four. Yet, many home bakers shy away from them, assuming they’re too complicated or time-consuming. What if I told you there’s a way to create stunning, bakery-quality petit fours with surprising ease? Forget the struggles of traditional cake balls or the frustrations of cake pops; these Truffle Petit Fours are a game-changer, making gourmet desserts accessible to everyone.
These little confections share a similar delicious base to a cake ball – a rich mixture of crumbled cake and frosting. However, the method for shaping and coating them is where the magic truly happens, transforming them from a rustic treat into an elegant, polished dessert. We’ll dive into why this approach is not only simpler but also yields a far more impressive result, perfect for any special occasion or just to treat yourself.
Why These Truffle Petit Fours Are Superior to Cake Balls and Cake Pops
Let’s be honest, while cake balls and cake pops are undeniably tasty, making them can be a bit of a hassle. Rolling cake balls by hand often leads to uneven sizes and messy fingers. And cake pops? Oh, the heartbreak of watching a perfectly formed cake pop tumble off its stick into a pool of melted chocolate! The process can be time-consuming, prone to error, and often results in a less-than-perfect finish. For many, the effort just isn’t worth the trouble, despite how much we love to eat them. Just a few bites are enough to satisfy that sweet craving without feeling overly indulgent – unless, of course, you can’t resist having six or seven, and don’t worry, your secret is safe with me!
This recipe offers a brilliant alternative, eliminating those common pain points. Imagine creating perfectly uniform, exquisitely coated treats without the mess or frustration. That’s the promise of these Truffle Petit Fours, and it all starts with a simple “lightbulb moment” that transforms the entire baking process.
The Eureka Moment: Silicone Molds and Poured Fondant
The inspiration for these elegant treats came from a surplus of delicious Devil’s Food cupcakes. Sometimes, baking leads to happy accidents – like overfilled cupcake liners that aren’t quite “pretty” enough for serving, but still perfectly delicious. Faced with a large batch, the initial thought was to simply turn them into family-style cake balls. However, as I reached for a mixing bowl, my eyes landed on a set of silicone trays.
This was the pivotal “lightbulb moment.” Why endure the mess and inconsistency of hand-rolling cake balls when silicone molds could effortlessly create uniform, beautifully shaped mini cakes? But the innovation didn’t stop there. While molds solved the shaping issue, the challenge of dipping them in melted chocolate remained. That’s when the idea clicked: if we’re already shaping them like Petit Fours, why not use a classic poured fondant for coating? Oh yes, this was the answer!
This method truly elevates the humble cake base. Not only do the silicone molds create perfectly uniform and pretty shapes, ideal for any sophisticated occasion, but the poured fondant proves to be a superior coating. It’s a bold statement, but it’s true: poured fondant provides a delicate sweetness that complements the cake mixture beautifully without overpowering its flavor, unlike some thick chocolate coatings. Moreover, fondant holds up exceptionally well, especially in warmer temperatures, making these petit fours perfect for summer gatherings or extended display.
The best part? The entire process is incredibly fast. Preparing the cake mixture and pressing it into molds takes perhaps 10 minutes. Covering them with poured fondant is even quicker. The main time commitment is simply waiting for the cake mixture to freeze and the fondant to set, leaving you with more time to enjoy your culinary creations and less time spent on labor-intensive steps.
Truffle Petit Fours: The Base Recipe
The foundation of these exquisite treats is a simple cake and frosting mixture. You have complete flexibility here, whether you prefer to bake a cake from scratch or use a convenient box mix, and the same goes for your frosting. This versatility allows you to customize the flavors to your heart’s content.
Ingredients for the Cake Base:
- 1 batch of already baked cake (your choice of flavor)
- 1-2 cups frosting (canned or scratch-made, coordinating with your cake)
For this particular batch, we used Cassie’s delightful Devil’s Food Cake and her luscious Peanut Butter Frosting, both recipes available here. The combination offers a rich and satisfying flavor profile that pairs wonderfully with a chocolate fondant.
Instructions for Preparing the Cake Base:
- Crumble your baked cake thoroughly into a large mixing bowl. Ensure there are no large lumps; a fine crumb consistency works best for a smooth petit four.
- Begin by adding 1 cup of your chosen frosting to the crumbled cake.
- Using a pastry blender or the back of a sturdy spoon, mix the frosting into the cake crumbs until fully blended. The mixture should come together smoothly and evenly.
- Test the moistness: Grab a small bit of the mixture and press it firmly in your hand. If it holds its shape without crumbling, it’s perfect. If it seems too dry or crumbly, gradually add more frosting, a tablespoon at a time, until the desired consistency is reached. Remember, different cakes have varying moisture levels, so adjust as needed.
- Once the mixture is ready, press it firmly into your silicone molds. It’s crucial to pack the mixture tightly to ensure the petit fours retain their shape and don’t fall apart when removed.
- Place the filled molds in the freezer for at least 2 hours, or until completely solid. This firming step is essential for easy removal and dipping.
Preparing Your Workspace and Removing Cakes from Molds
Before you begin the coating process, it’s vital to set up an efficient and clean workstation. Lay a sheet of wax paper or parchment paper on a baking sheet; this will catch any drips and make cleanup incredibly simple. Place a wire rack on top of the wax paper-lined baking sheet. You’ll also need a dipping tool (a specific candy dipping fork works wonders) or a regular kitchen fork, along with a small, sharp knife to assist in transferring the coated petit fours.
When your cake base is thoroughly frozen, gently remove each cake from its silicone mold. This should be quite easy if they are frozen solid. Place the released cakes onto a clean tray and immediately return them to the freezer. Keeping them very cold is key to preventing them from softening too quickly during the dipping process, ensuring a smooth, even coating.
Chocolate Poured Fondant: The Perfect Coating
The pièce de résistance of these Truffle Petit Fours is the elegant chocolate poured fondant. It’s similar in concept to a classic White Poured Fondant, but with the rich addition of unsweetened chocolate for a decadent finish. This thin, glossy coating not only looks professional but also melts delicately in your mouth, complementing the cake truffle inside.
Chocolate Poured Fondant

Ingredients
- 6 cups powdered sugar
- 1/2 cup plus 1 tablespoon water
- 2 tablespoons light corn syrup
- 1 teaspoon vanilla extract
- 3 ounces unsweetened chocolate, chopped
Instructions
- Combine sugar, water and corn syrup in a medium saucepan, stir until smooth.
- Over low heat, bring up to a temperature of 92-100 degrees Fahrenheit (33-38°C). Remove from heat and stir in vanilla and chopped chocolate. Stir until smooth and all chocolate is melted.
- Remove a few, maybe 4-5 cakes from the freezer at a time. Dip your fork (or dipping tool) in your warm fondant, then place a cake on the fork. Spoon fondant over the top of the cake, ensuring it drips down all sides for a full coating.
- Gently, using the edge of your knife, slide the coated cake onto the wire rack to cool and set up.
- Continue with remaining cakes, reheating fondant gently if it thickens too much.
Notes
Recipe source ChocolateChocolateandmore.com
Did you make this recipe?
Please leave a comment on the blog or share a photo on Instagram
You’ll be amazed at how quickly you can coat an entire batch of these little cakes. The fondant sets relatively fast, and with a little practice, your workflow will become incredibly efficient. It genuinely takes less time than meticulously dipping individual cake balls or struggling with melting chocolate.
Decoration and Finishing Touches
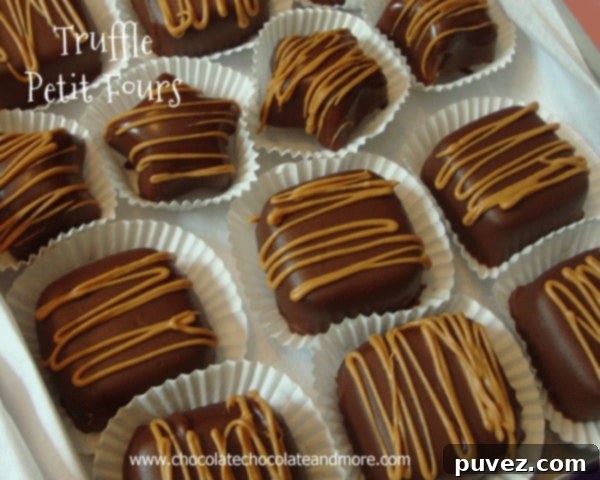
Once your petit fours are coated and have had at least 30 minutes to set, they are ready for decoration. This is where you can truly let your creativity shine! For a simple yet elegant touch, I used handy squeeze bottles to drizzle some melted chocolate over mine. The contrast of the dark chocolate drizzle against the smooth fondant adds visual interest and another layer of flavor.
I find the “drizzle” technique to be incredibly satisfying – it’s basically artistic scribbling that results in something so pretty! For the easiest removal from your wire rack, place the entire baking sheet with the rack and petit fours into the freezer for about 15-30 minutes. This will firm up the fondant and the drizzle, allowing you to lift them off cleanly without smudging or breaking.
Additional Decoration Ideas:
- Sprinkles: A classic choice for adding color and texture. Apply while the fondant is still slightly wet.
- Edible Glitter or Dust: For an extra touch of sparkle and sophistication.
- Small Candies or Pearls: Strategically placed for a refined look.
- Nut Toppings: Finely chopped nuts (like pistachios or pecans) for a gourmet crunch.
- Contrast Fondant Drizzle: Use a different colored or flavored poured fondant for a secondary drizzle.
- Marzipan or Gumpaste Decorations: For truly elaborate designs, small cut-out flowers or shapes can be added.
Serving and Storage Suggestions
These Truffle Petit Fours are best served at room temperature or slightly chilled. They make a perfect addition to dessert platters, afternoon tea spreads, or as elegant individual party favors. Their small size makes them ideal for tasting several different desserts without overindulging.
To store, place them in an airtight container at room temperature for up to 2-3 days, or in the refrigerator for up to a week. If refrigerated, allow them to come to room temperature for about 15-20 minutes before serving to ensure the best texture and flavor. They also freeze beautifully for up to a month; simply thaw in the refrigerator and then at room temperature before enjoying.
These Truffle Petit Fours are not just a dessert; they are a delightful experience, easy to make and guaranteed to impress. Give this recipe a try, and you might just find your new favorite way to create gourmet bite-sized treats!
Want More Pretty Treats?
If you loved making these elegant petit fours, you’ll surely enjoy exploring more bite-sized delights and decadent desserts from our collection. Here are a few more treats that are perfect for satisfying a sweet craving or sharing at your next gathering:
Petit Mocha Cheesecakes
Chocolate Meringues
Easy Palmiers
Simple Shortbread
Birthday Cake Milkshakes
Jello Swirl Cupcakes
