Classic Seven Layer Magic Bars: The Ultimate Easy Dessert Recipe
Step into the world of irresistible baking with Seven Layer Magic Bars – the legendary dessert bar that truly started all the magic! If you’re searching for a simple, yet profoundly satisfying sweet treat, look no further. These bars are a beloved classic for a reason, delivering a symphony of textures and flavors in every bite, all built upon an incredibly easy-to-follow recipe. From the crunchy graham cracker base to the gooey, rich topping, each layer contributes to a dessert experience that feels truly magical to create and even more delightful to devour.
A Confession and a Hilarious Typo: Tales from the Kitchen
As friends, I feel comfortable sharing my baking adventures with you, including the occasional, incredibly amusing blunders. And trust me, this particular story is bound to give us all a good laugh. It’s a testament to the fact that even seasoned bakers (or writers!) can have their moments, especially when navigating the tricky waters of online posting.
I could try to attribute this to my childhood dyslexia, a challenge I faced early on. I actually struggled so much with reading in first grade that I was held back. Thankfully, with support and perseverance, I overcame it and now I’m an avid reader – so there’s no need for sympathy here. That’s not the heart of this particular tale.
However, the lingering effects of transposing letters still pop up regularly. I find myself constantly typing “form” when I mean “from,” and often “teh” instead of “the.” Part of me wants to blame it on typing too quickly, trying to keep up with the flow of ideas. The frustrating part? Because “form” is a legitimate word, spell-check programs blissfully ignore the error, leaving me to catch it (or not, as was the case recently!).
Just the other day, I was excitedly posting a recipe for delicious Margarita Bars from my wonderful friend Paula over at Call Me PMc on my Facebook page. In my haste, I hit “Post” without that crucial final proofread. Then, I stepped away from the computer to tackle some non-digital tasks, completely unaware of the hilarity I had just unleashed upon my followers.
The Margarita “Bra” Incident: A Facebook Fiasco
If you’re looking to grab attention on Facebook, perhaps inadvertently, try transposing a few letters and changing “Bars” to “Bras.” Yes, you read that right. Instead of “Margarita Bars,” I triumphantly posted about “Margarita Bras.” The internet, as it often does, noticed immediately.
My amazing fans, with their keen eyes and fantastic sense of humor, quickly spotted my hilarious slip-up. The comments section exploded with good-natured teasing and laughter. I truly believe they were laughing *with* me, not *at* me, and it was genuinely a joy to read their creative responses:
- “I think someone has already had one too many margarita BRAS!!”
- “Nothing like a margarita bra to make a person’s day!!!”
- “One Too Many Bras for you today lol lol”
- “Thanks for the laugh, never had a margarita bra”
- “Must have had one too many shots of tequila when baking… Cute typo”
I absolutely cherish the connection I have with my community, where we can share a good laugh, even at my own expense. Because, honestly, if you can’t find humor in your own mistakes and laugh them off, that in itself is a missed opportunity for joy. This little mishap served as a wonderful reminder that sometimes, the best recipes come with a side of unexpected laughter.
Celebrating the Classic: Seven Layer Magic Bars
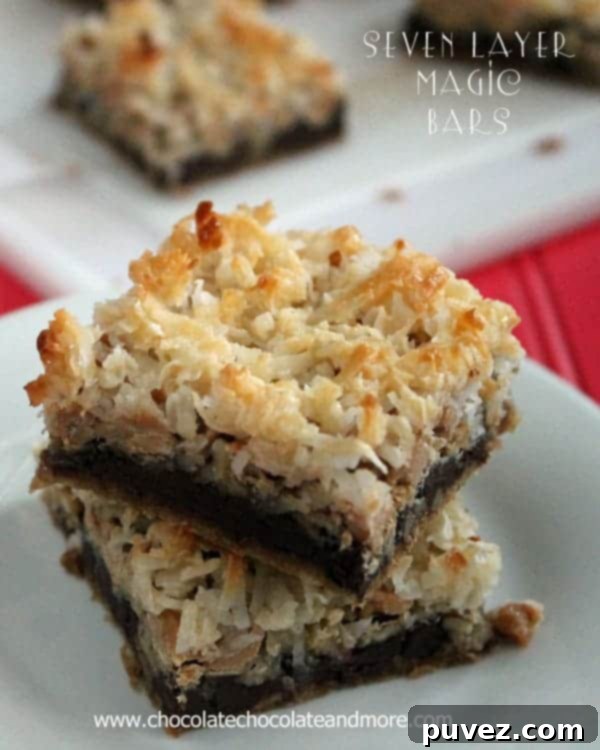
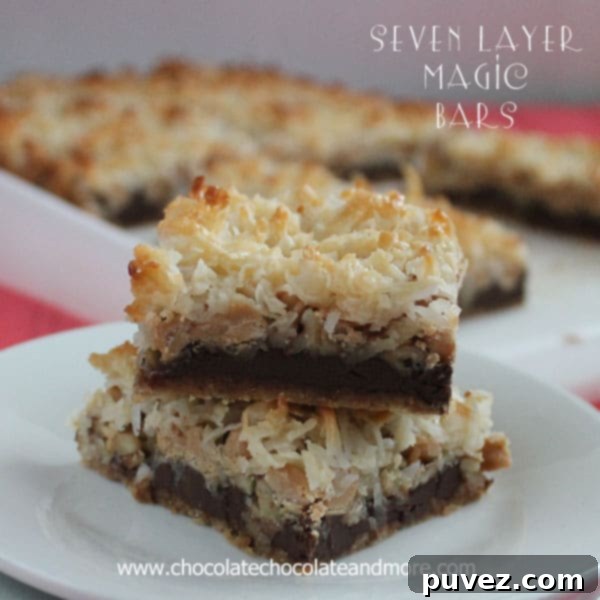
So, in tribute to all “Bra Bars” (and real dessert bars!) everywhere, I’m taking this opportunity to share the recipe for these incredible Seven Layer Magic Bars. These are genuinely one of my all-time favorite dessert bars, a true staple in my baking repertoire. I adore every single layer, from the crumbly base to the rich, gooey top. What makes them even better is how incredibly easy they are to prepare, making them a perfect choice for both novice and experienced bakers. In many ways, these bars are the foundational blueprint for countless other layered bar recipes out there, a testament to their timeless appeal and perfect combination of ingredients.
The beauty of Magic Bars lies in their simplicity. You begin with the perfectly pressed graham cracker crust, a golden foundation for all the goodness to come. From there, it’s a delightful process of layering: rich chocolate chips, crunchy pecans, sweet peanut butter chips, and finally, a generous sprinkle of shredded coconut. The grand finale? A luscious drizzle of sweetened condensed milk, which acts as the magical binder, seeping down through all the layers and transforming them into one cohesive, undeniably scrumptious bar as it bakes. This milky blanket not only holds everything together but also imbues the bars with their signature chewy, melt-in-your-mouth texture.
Tips for Perfect Seven Layer Magic Bars
Achieving perfect Seven Layer Magic Bars is surprisingly straightforward, but a few simple tips can elevate your baking experience and ensure a fantastic result every time:
- Pan Preparation is Key: Don’t skip lining your baking pan with parchment paper. This simple step makes removing the entire slab of bars incredibly easy once cooled, allowing for neat, clean cuts without any sticking. A light spray of cooking spray under the parchment paper can also help it stay in place.
- Evenly Press the Crust: When forming the graham cracker crust, ensure it’s evenly pressed into the bottom of the pan. A flat bottom of a glass or a measuring cup can help achieve a uniform, compact crust that won’t crumble apart.
- Layering with Care: While the order of the chocolate chips, pecans, and peanut butter chips can be slightly flexible, ensure each layer is spread evenly across the pan. This guarantees that every bite will have a balanced mix of flavors and textures.
- Sweetened Condensed Milk Coverage: Drizzle the sweetened condensed milk thoroughly over the coconut layer, making sure it covers as much of the surface as possible. This milk is the “glue” that binds all the delicious layers together, creating that signature gooey texture.
- Don’t Overbake: Keep a close eye on your bars during the last few minutes of baking. They are done when the edges of the coconut start to turn a light golden brown. Overbaking can lead to a dry, rather than gooey, bar.
- Cool Completely: Patience is a virtue, especially with Magic Bars! It’s crucial to let them cool completely, preferably for several hours or even overnight, before attempting to cut them. This allows the condensed milk to set properly, ensuring clean, firm squares. Pop them in the fridge to speed up the cooling and setting process if you’re in a hurry.
- Storage: Store your cooled Magic Bars in an airtight container at room temperature for up to 3-4 days, or in the refrigerator for up to a week. They also freeze wonderfully for longer storage!
Connect with Chocolate Chocolate and More!
Facebook | Twitter | Google+
Pinterest | Instagram
Save your favorite recipes to your personal recipe box with the ![]() button on all my recipes! Create a Meal Plan with your “favorite” recipes and the ingredients will automatically be added to your own Grocery List!
button on all my recipes! Create a Meal Plan with your “favorite” recipes and the ingredients will automatically be added to your own Grocery List!
Seven Layer Magic Bars

Ingredients
- 2 cups crushed graham crackers
- 1/2 cup butter, melted
- 2 cups semi-sweet chocolate chips
- 1 cup chopped pecans (or walnuts)
- 1 1/2 cup peanut butter chips (the whole bag)
- 1-1 1/2 cups shredded coconut
- 1 can sweetened condensed milk, 14 ounces
Instructions
- Preheat oven to 350 degrees F (175 C). Lightly spray a 9×13 baking pan with cooking spray, then line with parchment paper, leaving an overhang on the sides for easy removal of bars after baking and before cutting.
- Combine graham cracker crumbs and melted butter in a bowl until evenly moistened. Press the crumb mixture firmly into the bottom of the prepared pan to form a compact crust.
- Evenly layer the semi-sweet chocolate chips, chopped pecans (or walnuts), peanut butter chips, and then shredded coconut over the entire crust in the pan.
- Carefully drizzle the entire can of sweetened condensed milk over the top of the coconut layer, ensuring all the milk is used and the layers are completely covered.
- Bake for approximately 25 minutes, or until the edges of the coconut start to turn a beautiful golden color. Remove from oven and allow to cool completely on a wire rack before cutting into individual bars. For best results, chill before cutting. Store in an airtight container at room temperature.
Notes
recipe source ChocolateChocolateandmore.com
Did you make this recipe?
Please leave a comment on the blog or share a photo on Instagram
Craving More Irresistible Bar Recipes?
If you’ve fallen in love with the ease and deliciousness of Magic Bars, you’re in for a treat! Our collection of bar recipes is perfect for any occasion, whether you need a quick dessert for a potluck, a delightful snack, or simply a sweet indulgence. From fruity and zesty to rich and chocolatey, there’s a bar here for every palate. Explore these other fantastic options to keep your sweet tooth satisfied!
Lemon Pie Bars
Reese’s Chocolate Peanut Butter Cup Magic Bars
S’mores Cereal Bars
Lemon Crumb Bars
Birthday Blondies
Lunch Lady Brownies
Chewy Bars
